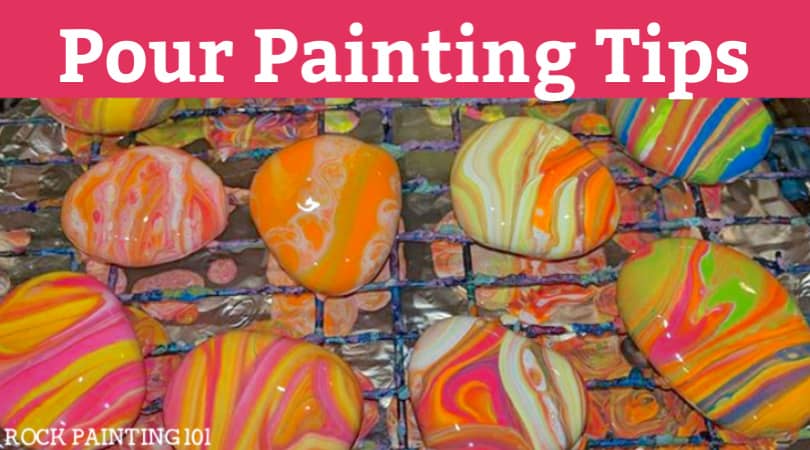
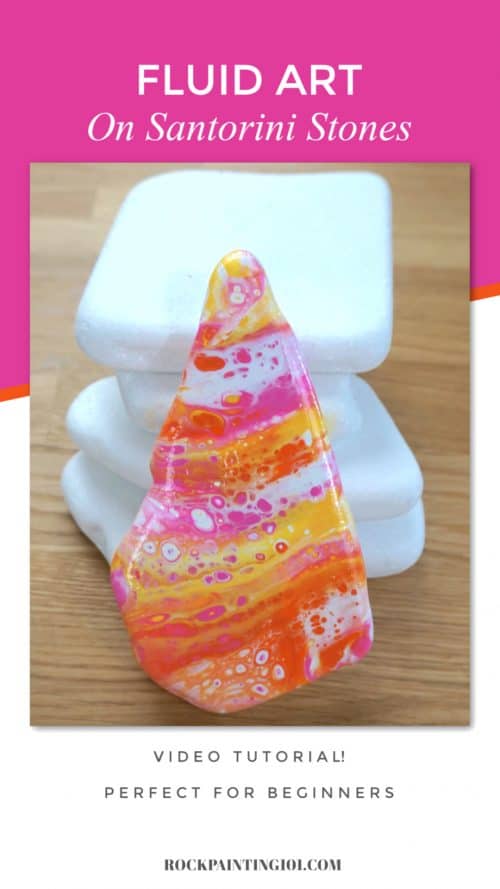
This acrylic pour swipe method creates beautiful rocks that are unique and fun. Check out the step by step instructions or follow along with the video tutorial. You’ll be mastering this popular pour painting technique before you know it!
Acrylic Pour Swipe Method
Pour painting with acrylics is taking YouTube, Facebook, and the rock painting community by storm. There are several techniques, a variety of mediums, and endless questions when it comes to this fun process.
We have been creating pour painted rocks for a few years and we love that no two rocks are the same.
This acrylic pour swipe method is a fun twist on the standard pour. One of the most important things you’ll need is to find the right rock. You want something big and flat so that you get a good swipe and so your cells develop.
This post is sponsored by Capcouriers and contains affiliate links which means if you make a purchase using the link, I could receive a commission. Check out all the details here.
What you need for pour painting with a swipe
In this pour painting tutorial I used my Deco Art paints mixed with Floetrol. To create the cells, I added one drop of Garnier Fructis Sleek and Shine to my white paint.
The most important supply you need to get a good swipe, is a nice large and flat rock. We recommend using the large Santorini stones from Capcouriers
Pour painting with acrylics
Start by mixing a 50/50 ratio of paint and Floetrol. Then add one drop of Garnier Fructis to your white paint.
Create a quick base using the white paint. Since these Santorini rocks are so pretty, I don’t go over the sides of the rock. Just pretend like you’re icing a cookie. 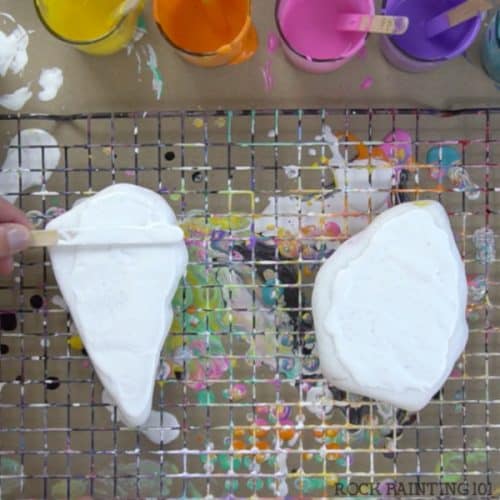
Next start adding dots of each color. I added two layers of dots so that they mixed together well. Then add a few dots of the white paint to the top.
101 Tip: Make sure that there is plenty of paint on the side that you want to pull from.
Use a straight and flat object to pull the paint. I used a plastic ruler. Be sure that the tool is touching all along the starting side.
With very light pressure, pull the tool accross the rock. If you hear scraping, you are pushing down too hard.
You can already see the cells forming.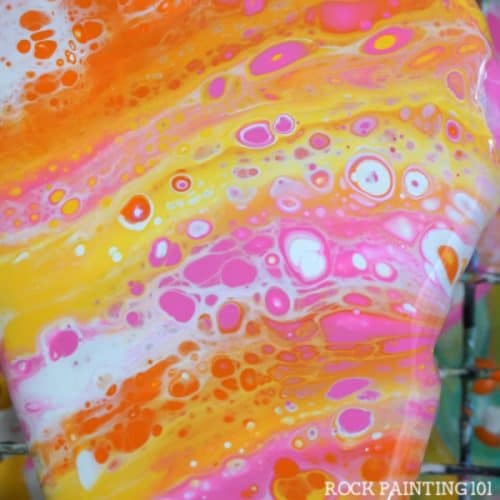
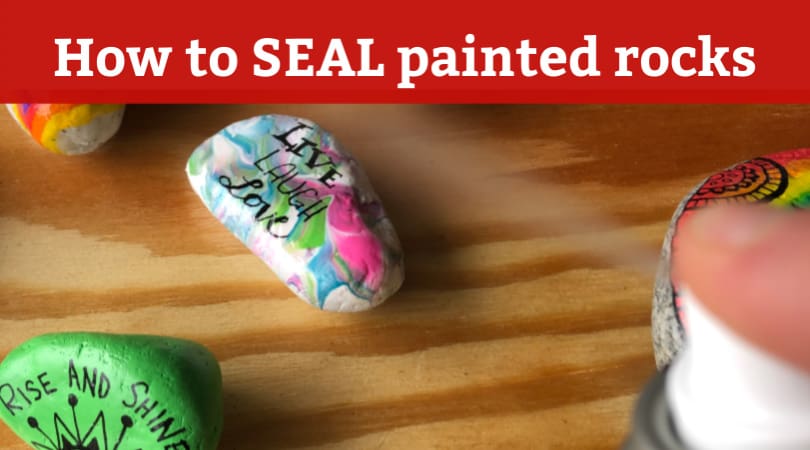
How to seal acrylic pour painting
It is extremely important to give your poured rocks plenty of time to dry before sealing. They may become dry to the touch in a day or so. But I like to give my rocks at least 3 or 4 days before sealing them.
When the rocks are dry, they will look dull. A good glossy sealer will bring the shine back.
Check out our favorite sealers and our tips for sealing painted rocks.
Acrylic pour swipe technique video tutorial
Don’t forget to subscribe at the end!
Grab your Capcourier flat white rocks on Amazon!
Pin this Rock Painting Idea to your favorite Pinterest board!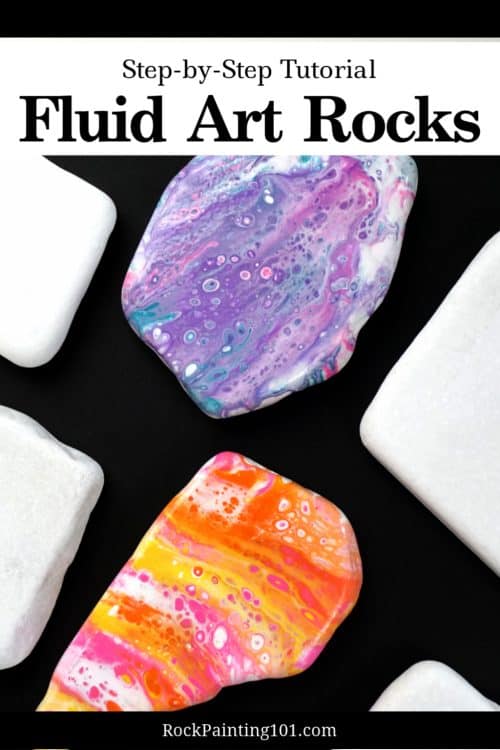
If you enjoyed this fun rock painting idea, you’ll love these!