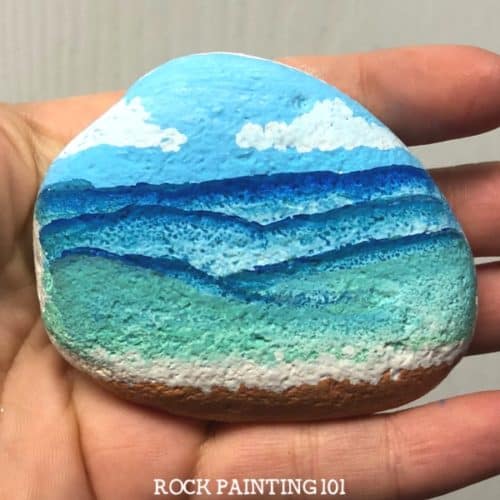
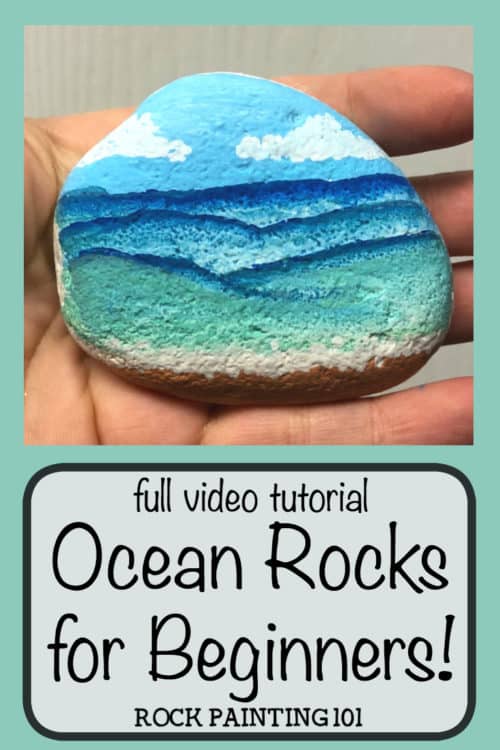
Creating beach painted rocks can be intimidating. But with a few tips and a little patience, you can paint a beautiful beach scene.
Beach Painted Rock
Who wants to head to the beach? This week’s #52Rocks! prompt was a beach painted rocks. I had never painted a beach scene before! Creating waves on rocks is intimidating! But I pulled out my paint pens and started experimenting and I really loved how these turned out! It turns out that painting a beach onto a rock is not as hard as I thought. My 4-year-old daughter even attempted it. So give this rock painting idea a try. I think you’ll enjoy the results!
This page contains affiliate links which means if you make a purchase using the link, I could receive a commission. Check out all the details here.
Step by step instructions for a fun summer rock idea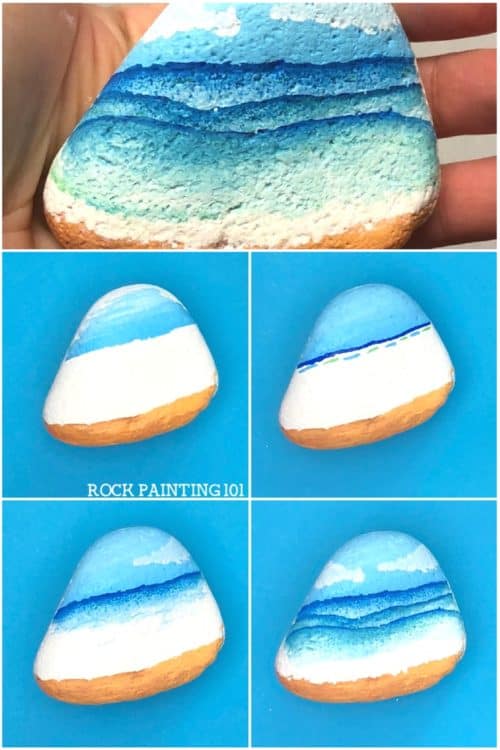
To create this fun wave effect, start in the sky and work your way forward. I start with a layer of white and then add blue from the horizon up through the white. I use a circular motion with my favorite paint pens. The blue will blend with the white.
Next, I’m going to add some sand so that it has some time to dry. To get the right color I suggest using a peach and brown combo to create the sand color. When I first got these pens, I was nervous to blend two colors of paints together. But they clean so easily that you don’t need to worry about ruining your pens.
To create this beach painted rock, you want to work fairly quickly so that you can mix those paints properly. Create dark blue line right along the horizon line. Then dab back and forth with a green and light blue pen.
Then take a damp paintbrush and blend the green and light blue. Get the brush damp again and start pulling the dark blue down through the other two colors. Be cautious of the top line so that you keep your horizon clean. If you want more of the dark blue, you can add some more while the rock is still wet.
101 Tip!: If you’re not getting the look you want, make sure your brush isn’t too wet.
You want to make sure that you let this wave dry completely. Otherwise, your new wave won’t have that nice crisp top.
While you’re waiting, you can add some clouds in the sky. To paint clouds, just grab your paint pen and paint with light circular motions.
When you add your next wave, make sure to leave some of the light colors in between the dark blue line. As you move forward, you’ll have more space in between the waives.
To create the foam that crashes to the shore, take a white pen and dab gently along the beach line.
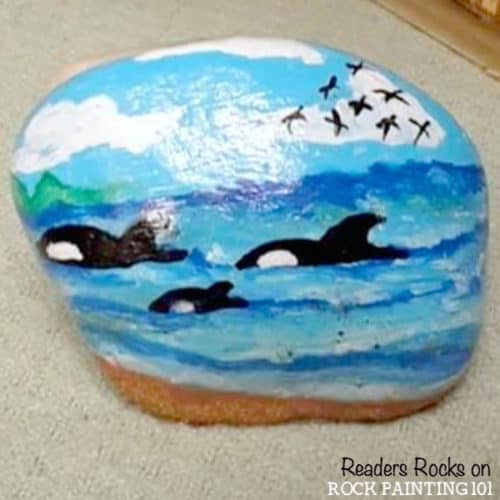
What will you add to your beach rock? Check out what some of our readers have added!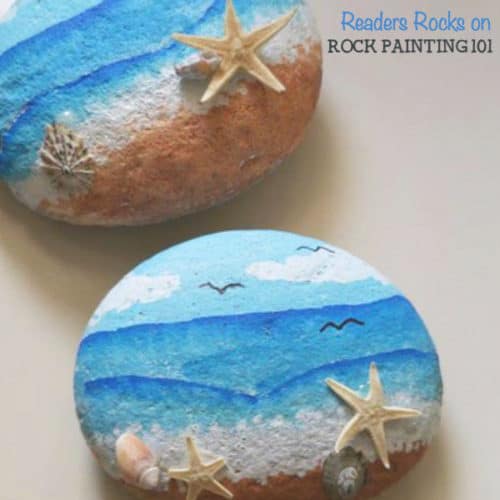
How to paint a beach onto a rock!
You can grab the Posca pens that I used on this painted rock here.
Pin this summer rock to your favorite Pinterest board!
If you create one of these rocks, please share it with us!! Leave a picture in the comments of our Facebook Live!
If you enjoyed this fun rock painting idea, you’ll love these!