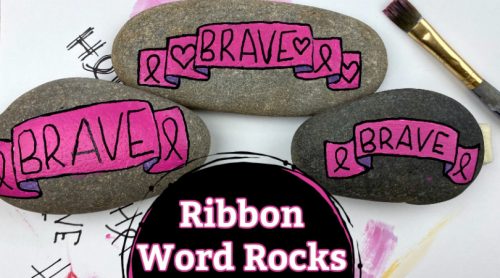
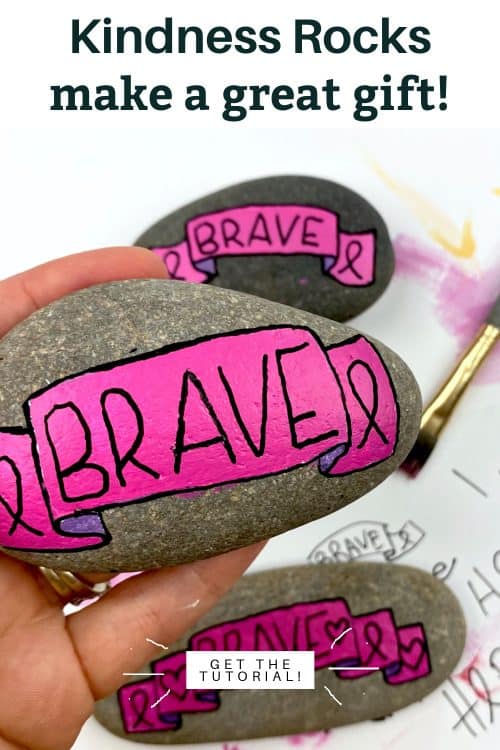
If you are creating an awareness rock or just adding a little flair to your word rocks if you paint a ribbon it gives it a nice touch!
This page contains affiliate links which means if you make a purchase using the link, I could receive a commission. Check out all the details here.
Creating this beautiful ribbon rock design is all about the shadows. In this tutorial we will talk about how to create a good shadow color for your stone!
Supplies to Paint your Ribbon Word Rock
I am using pink for my ribbon rocks for breast cancer awareness. No matter the color of your ribbons you will most likely want to paint down white first. For the shadow color you will want something from the opposite side of the color wheel. So pink will be green, blue would be orange, & yellow would be purple. For the lining I am using a black fine tip paint pen.
CLICK HERE to see ALL of our FAVORITE rock painting supplies!
Painting a Ribbon Rock Step-by-Step
Start by creating a wavy line across the top of your rock. Create vertical lines going down from the tip of each curve. Keep all of the vertical lines the same length. Create lines to the bottom of each section parallel to the top lines. The ribbon can be flipped both ways!
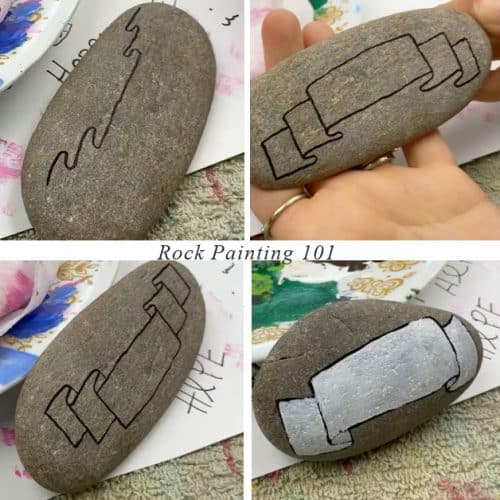
Add vertical lines on the inside curves that stop when they hit the ribbon. Then fill it all in white.
Paint the top of the ribbon leaving the small curl spots where the back of the ribbon is exposed white. To mix your shadow color add a small amount of a complimentary color. In this case I have a green.
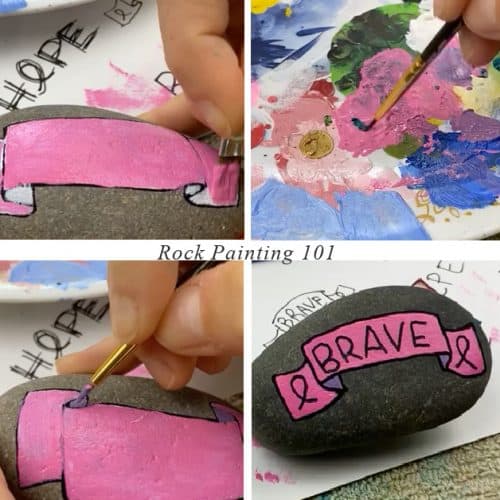
Fill in these shadow areas. Then reline and add on your word(s). I added awareness ribbons on the sides of the word, but you can use this space to decorate any way you like! You can add dates, hearts, or anything else!
Painted Ribbon Video Tutorial
Need to see a few more details? Watch the full length tutorial below!
Pin this rock painting idea to your favorite Pinterest board!
I hope you have a chance to try this painting tutorial! Take a minute and pin it to share and save it for later!